Connection Guide
Pair a Nikon camera with Zensō over Wi-Fi — for EXPEED 7 cameras and older models.
Zensō connects to Nikon cameras over your local Wi-Fi. Choose your camera type below and follow the steps on the camera, then return to Zensō to finish pairing.
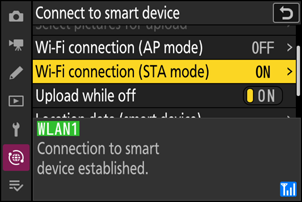
Use Connect to Smart Device and Wi-Fi Connection (STA Mode).
Create a fresh camera profile
For every new device or new network, create a new profile on the camera. Do not reuse a profile created for SnapBridge or another app.
Prefer the 5 GHz band
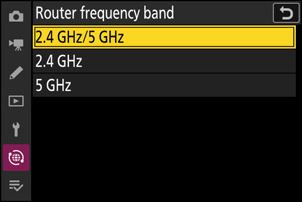
If your camera has Router frequency band, set it to 5 GHz when your Wi-Fi network supports it. This usually gives a smoother and more stable connection.
Open Wi-Fi Connection (STA Mode)
On the camera, open Connect to Smart Device, choose Wi-Fi Connection (STA Mode), then create a profile.
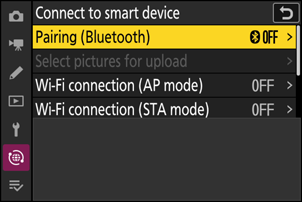
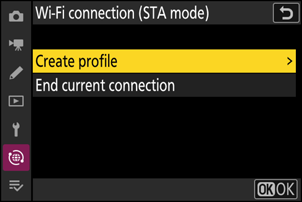
Do not choose Wi-Fi Connection (AP Mode).
Choose the same Wi-Fi or hotspot
Connect the camera and this device to the same Wi-Fi network or to a hotspot from another device. If this device is sharing a personal hotspot, connect the camera to that hotspot.
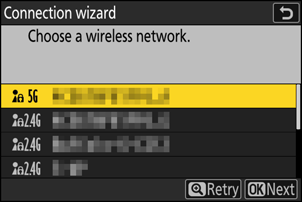
Use English letters, numbers, and common symbols for the Wi-Fi or hotspot name. Avoid Chinese characters, special symbols, and emoji.
Let the camera obtain an IP address
Use automatic IP assignment when possible. If the camera displays the assigned IP address, keep it visible or write it down.
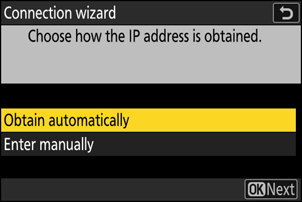
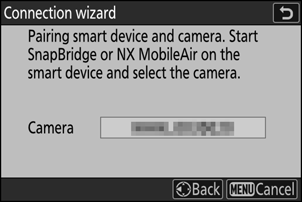
Keep the connection wizard open
When the camera waits for the other device, stay on that screen. Do not exit the connection wizard before Zensō connects.
Permissions used by Zensō
Local Network access is requested when you scan for cameras. Location is requested only when you turn on features that use location.
- Local Network access is required for camera discovery.
- Background connection asks for Always location access so the connection can continue after switching apps.
- Sync location asks for When In Use location access.
Find the camera in Zensō
Return to the home screen and pull down to scan. When your camera appears, select it and follow the prompts on the camera and in Zensō.
- If the camera does not appear, long-press the network button in the top right and enter the IP address shown on the camera.
- Keep this device and the camera on the same Wi-Fi network or hotspot.
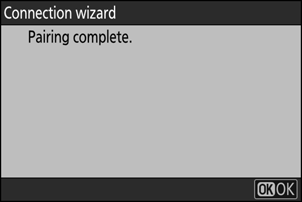
Confirm pairing on the camera
After Zensō finds the camera, follow the camera prompt and confirm the connection.
Connection ready
When the camera shows that the connection is complete, return to Zensō and start using camera controls, Live View, gallery, and downloads.
Use Connect to computer or Connect to PC, then Search for Wi-Fi network.
Create a fresh camera profile
For every new device or new network, create a new profile on the camera. Do not reuse a profile created for SnapBridge or another app.
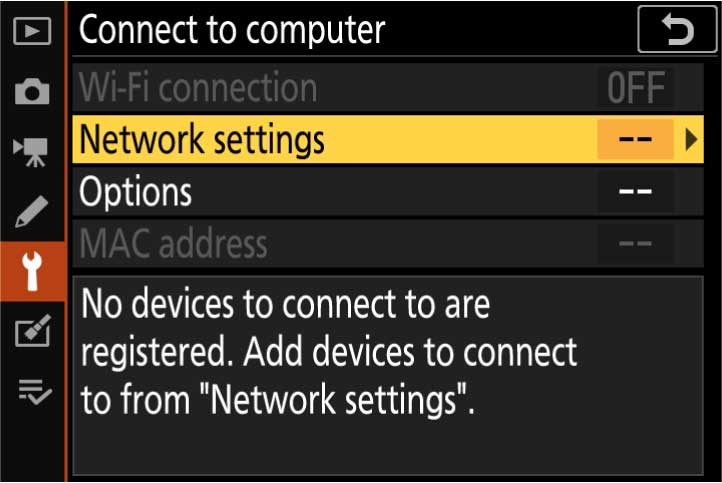
Open Connect to computer
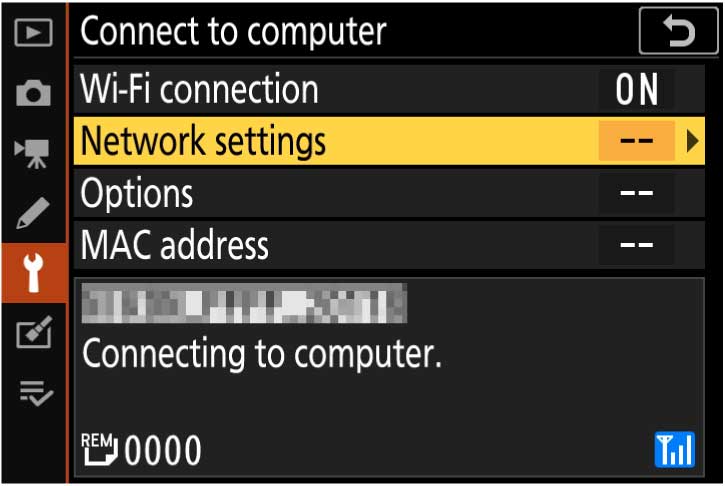
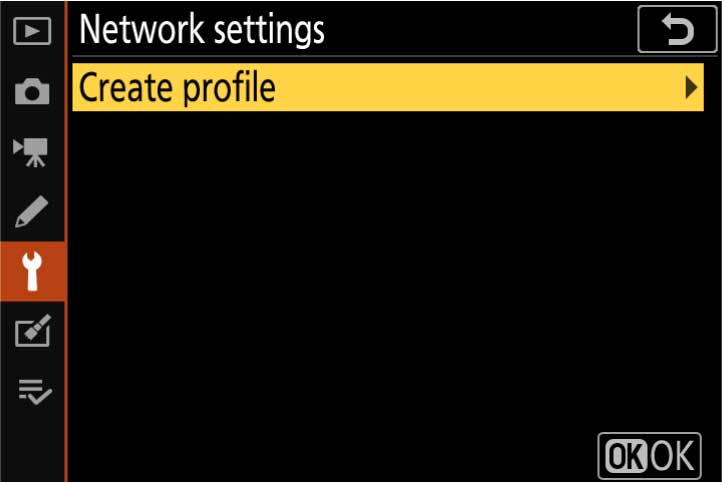
In the camera setup menu, open Connect to computer, then Network settings. Some older cameras call this menu Connect to PC.
Choose Search for Wi-Fi network
Choose Search for Wi-Fi network so the camera joins an existing Wi-Fi network.
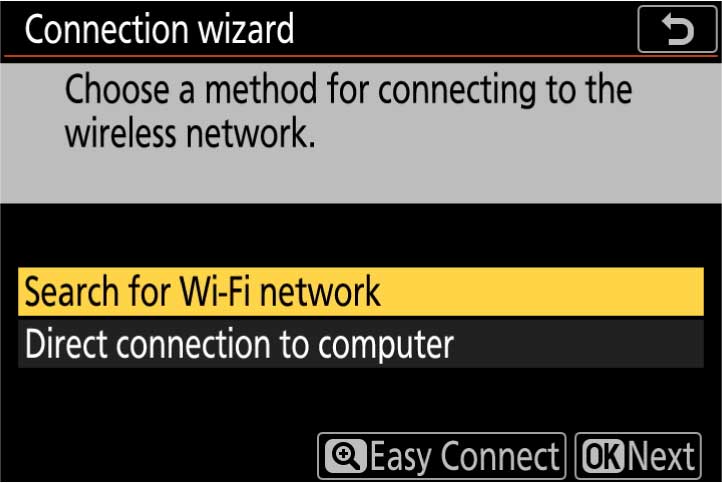
Do not choose AP mode or Direct connection to computer.
Choose the same Wi-Fi or hotspot
Connect the camera and this device to the same Wi-Fi network or to a hotspot from another device. If this device is sharing a personal hotspot, connect the camera to that hotspot.
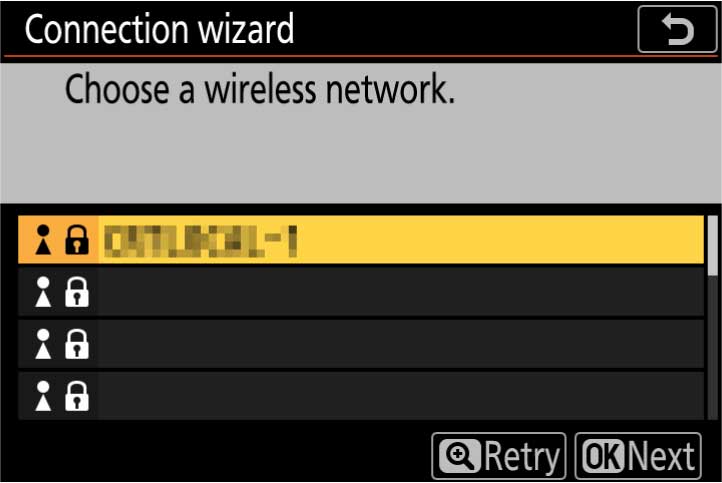
Use English letters, numbers, and common symbols for the Wi-Fi or hotspot name. Avoid Chinese characters, special symbols, and emoji.
Record the camera IP address
After the camera joins the network, keep the displayed IP address visible or write it down. You can use it for manual connection in Zensō.
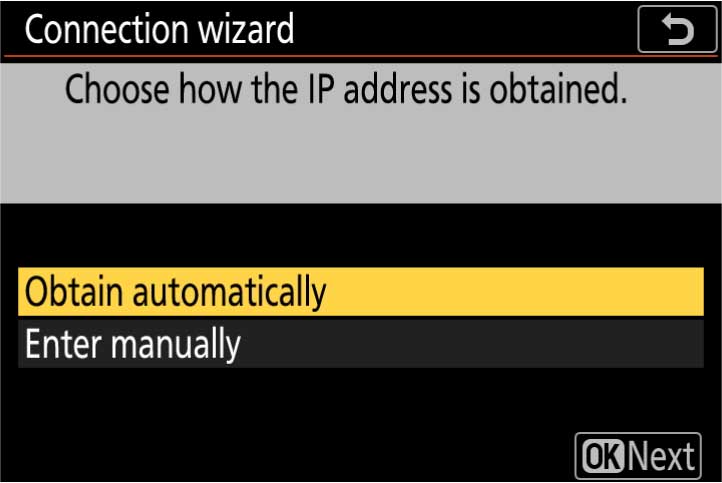
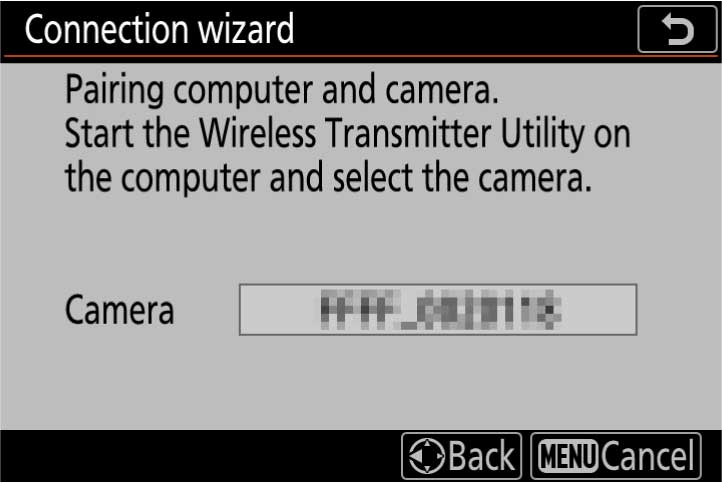
Keep the connection wizard open
When the camera waits for the other device, stay on that screen. Do not exit the connection wizard before Zensō connects.
Permissions used by Zensō
Local Network access is requested when you scan for cameras. Location is requested only when you turn on features that use location.
- Local Network access is required for camera discovery.
- Background connection asks for Always location access so the connection can continue after switching apps.
- Sync location asks for When In Use location access.
Find the camera in Zensō
Return to the home screen and pull down to scan. When your camera appears, select it and follow the prompts on the camera and in Zensō.
- If the camera does not appear, long-press the network button in the top right and enter the IP address shown on the camera.
- Keep this device and the camera on the same Wi-Fi network or hotspot.
Confirm pairing on the camera
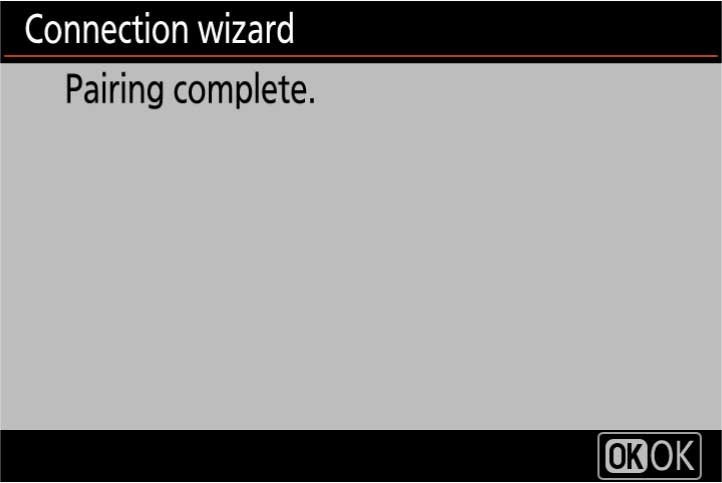
After Zensō finds the camera, follow the camera prompt and confirm the connection.
Connection ready
When the camera shows that the connection is complete, return to Zensō and start using camera controls, Live View, gallery, and downloads.